The TV wall has become the focal point of most living spaces, yet it’s often treated as an afterthought. A flat screen mounted on builder-grade drywall doesn’t do justice to the rest of your room, and it certainly won’t wow guests or make family movie nights feel special. Whether you’re tackling a family room refresh or redesigning your entire living room, the wall behind your television offers serious potential for both function and visual impact. The right approach can hide cables, add storage, create architectural interest, and make that 65-inch screen feel like it belongs.
Table of Contents
ToggleKey Takeaways
- TV wall ideas transform your living room’s focal point from a blank slate into a functional and visually striking design feature that showcases your television intentionally.
- Accent walls using wood slats, board-and-batten paneling, or textured stone treatments add dimension and visual interest without requiring major construction work.
- Built-in storage and floating shelves provide practical solutions to hide cables, store components, and organize media while maintaining a polished appearance.
- In-wall power kits and cable management planning must happen before installation—running cables inside walls keeps cords hidden and creates the clean, finished look your TV wall deserves.
- Proper TV mounting into wall studs, combined with the right bracket system and floating stands or minimalist design elements, ensures both safety and aesthetic appeal in your media space.
Why Your TV Wall Deserves Special Design Attention
A television mounted on a blank wall creates a black hole effect when turned off, it’s a dead rectangle that your eye gravitates toward, whether you like it or not. That’s why smart living room TV wall ideas treat the entire surface as an intentional design feature, not just a place to hang hardware.
From a practical standpoint, a well-designed TV wall solves cable clutter, provides space for components and media, and can integrate lighting to reduce screen glare. From an aesthetic angle, it anchors the room’s layout and offers a chance to introduce texture, color, or architectural detail that elevates the entire space.
Before selecting a design approach, measure the wall dimensions and identify stud locations using a stud finder. Mark the studs with painter’s tape, you’ll need them for mounting brackets, shelving supports, or panel fasteners. If your TV weighs more than 50 pounds or you’re adding built-ins, consider consulting a structural engineer or contractor to verify wall load capacity, especially if dealing with drywall over metal studs.
Don’t overlook electrical planning. If you’re opening walls or adding features, now’s the time to install an in-wall power kit (must be UL-listed for code compliance) and run low-voltage conduit for HDMI and other cables. This keeps everything hidden and avoids dangling cords that ruin the finished look.
Modern Accent Wall Designs for TV Placement
An accent wall sets the TV apart without requiring cabinetry or major construction. The key is choosing materials that add dimension and won’t compete visually with the screen itself.
Wood Slat and Paneling Options
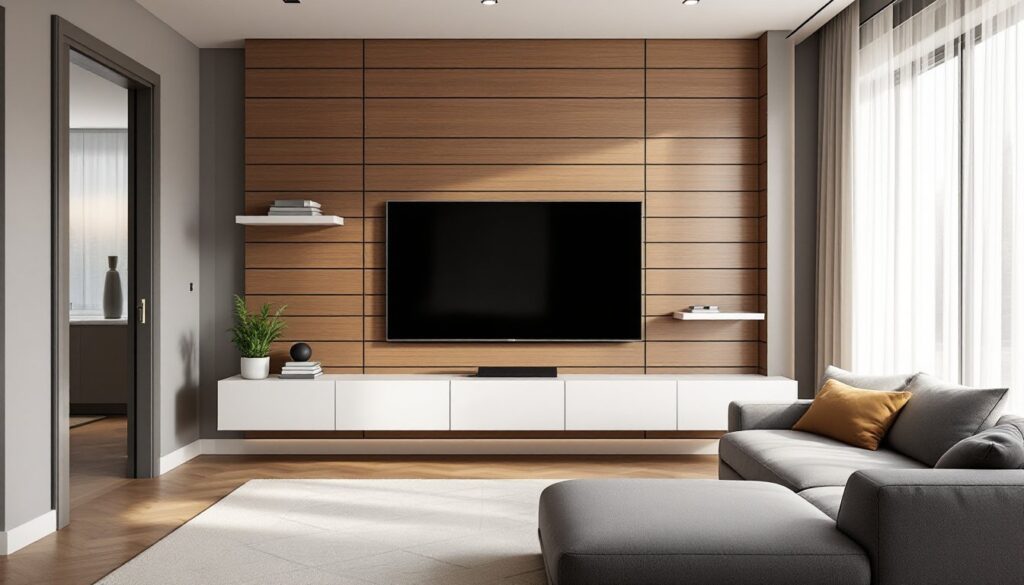
Wall-mounted wood slats create the horizontal or vertical lines that make TV wall design ideas feel contemporary and intentional. 3/4-inch thick slats spaced 1 to 2 inches apart are common: you can use dimensional lumber (1×2, 1×3, or 1×4 nominal) or purchase prefinished slat panels.
For a DIY installation, start by mounting a 1×2 or 1×3 horizontal furring strip at the top and bottom of your accent wall area, screwed into studs every 16 inches. Then attach vertical slats with a brad nailer or finish screws, using a spacer block (a scrap piece of wood cut to your gap width) to keep spacing consistent. Stain or paint the slats before installation to save time and get cleaner edges.
Board-and-batten paneling is another solid choice for family room TV wall ideas. Install vertical battens (typically 1×3 or 1×4 boards) over a painted or wallpapered base wall, spacing them evenly. The TV can be centered between battens or span multiple sections, depending on screen size. Prime and paint all pieces with a satin or eggshell finish, flat paint shows scuffs too easily in high-traffic rooms.
Stone and Textured Feature Walls
Stacked stone veneer, thin brick, or large-format porcelain panels bring a high-end look but require more prep. These materials add weight, natural stone veneer can weigh 12–15 pounds per square foot, so confirm your wall can handle the load.
Install a weather-resistant barrier (WRB) and metal lath over the drywall if using real stone or brick veneer, even indoors. This provides a mechanical bond for mortar. Mix Type S mortar for stone work, applying it with a notched trowel and pressing pieces firmly. Work from the bottom up, using spacers if you want uniform grout lines.
For a faster, lighter option, consider faux stone panels made from polyurethane. These can be applied directly to drywall with construction adhesive and weigh a fraction of real stone. They won’t fool a mason, but from six feet away, the texture reads convincingly, and many modern interior design portfolios showcase creative uses of textured wall treatments in media rooms.
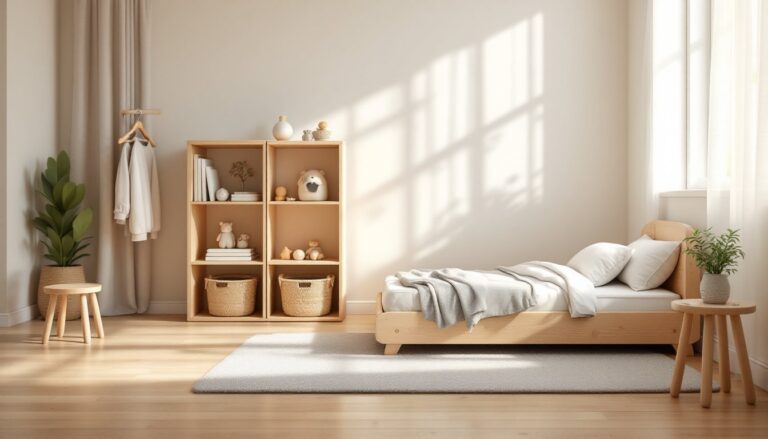
Built-In Storage and Shelving Solutions
If you need to store components, gaming consoles, books, or decor, built-in shelving turns the TV wall into a hardworking design element. These systems range from DIY bracket shelves to full custom cabinetry.
Bracket-and-board shelving is the simplest approach. Use heavy-duty metal shelf brackets (rated for at least 50 pounds each) fastened into studs, then top them with 3/4-inch plywood or solid wood planks. Paint or stain the boards to match your trim. Space shelves 12 to 16 inches apart vertically, enough clearance for components and decorative objects.
For a cleaner look, consider floating shelves with hidden brackets. These work well for wall TV ideas that prioritize minimalism. Use a French cleat system for heavier loads: rip a 1×4 at a 45-degree angle, mount one half to the wall (into studs), and attach the mating piece to the back of the shelf. This distributes weight and allows easy removal.
Full built-in units frame the TV with cabinets, open shelving, or a combination of both. If you’re comfortable with basic carpentry, you can build these using 3/4-inch plywood for the carcass, 1×2 face frames, and inset or overlay doors. Cut dadoes (grooves) for fixed shelves using a table saw or router with a straight bit, and join the cabinet boxes with wood glue and 1-1/4-inch pocket screws.
Measure the TV’s width and height with the mount installed, it often sits a few inches off the wall. Leave at least 3 inches of clearance on all sides for ventilation. If adding cabinet doors, soft-close hinges (35mm European style) are worth the extra cost and easy to install.
Paint built-ins with a semi-gloss or satin acrylic enamel for durability. Prime raw wood with an oil-based or shellac primer to prevent tannin bleed and wood grain from telegraphing through the topcoat.
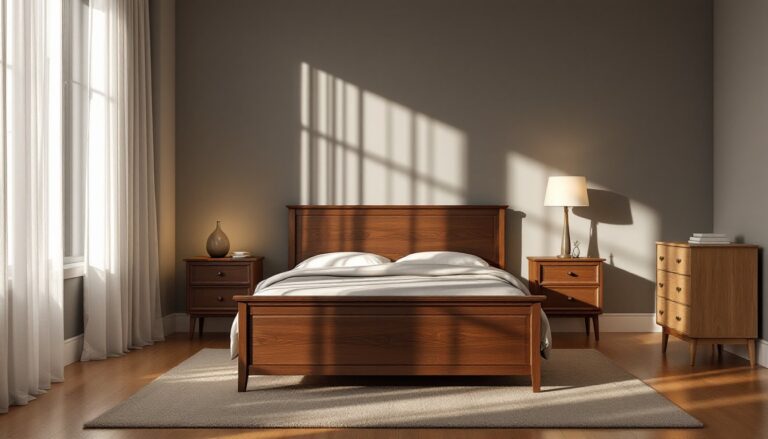
Floating TV Stands and Minimalist Approaches
Floating TV stands deliver the clean lines of wall-mounted TV ideas without the commitment of built-ins. These units are attached directly to the wall, leaving the floor clear underneath, a look that’s popular in modern home decor trends and especially useful in smaller spaces.
Most commercial floating TV stands mount using a cleat or rail system that hooks onto a wall-mounted bracket. Installation requires locating studs and fastening the bracket with 3-inch lag screws. If studs don’t line up with your desired placement, span between them with a 3/4-inch plywood backer board screwed into multiple studs, then mount the bracket to the backer.
For DIY builders, you can create a custom floating console using a hollowed-out box made from 3/4-inch plywood. Build the box slightly deeper than you need (typically 16 to 20 inches), attach a 2×4 ledger to the wall studs, then slide the box over the ledger and secure it from the inside with screws. The front and sides appear to float, and you can run cables through the back before mounting.
Pair a floating stand with a wall-mounted TV to keep everything off the floor. This combination simplifies cleaning and creates strong visual symmetry, especially effective when the console width matches or slightly exceeds the TV width.
Keep wall-mounted TV decor ideas minimal: one or two small sculptures, a trailing plant, or a slim decorative bowl. Overcrowding the console defeats the purpose of the floating aesthetic.
Cable Management and Practical Considerations
Nothing ruins a clean TV wall faster than a tangle of cables. Proper cable management should be planned before you mount the TV or build any surrounding features.
The cleanest solution is an in-wall power and cable kit. These kits include two wall plates (one behind the TV, one near the floor) connected by flexible tubing that routes cables inside the wall. Make sure the kit is CL2- or CL3-rated for in-wall use and meets National Electrical Code (NEC) requirements. You’ll need to cut two rectangular holes in the drywall, feed the cables, and install the plates, doable with a drywall saw, fish tape, and a voltage tester.
Important: Never run standard power strips or extension cords inside walls. That’s a code violation and a fire hazard. Only run low-voltage cables (HDMI, coax, speaker wire) or use a kit with a proper in-wall power extension that’s UL-listed for the purpose.
If opening the wall isn’t an option, surface-mounted cable raceways (plastic channels that stick or screw to the wall) are the next best thing. Paint them the same color as your wall to make them less noticeable. Route cables vertically down from the TV to a media console or outlet, vertical lines are less distracting than horizontal ones.
For open shelving or floating designs, use cable sleeves or spiral wraps to bundle cords together, then tuck them against the back edge of shelves. Adhesive cable clips keep things tidy and prevent sagging.
When mounting the TV itself, use a tilting or full-motion mount if you need flexibility for viewing angles or glare reduction. Mounts are rated by weight and VESA pattern (the spacing of mounting holes on the back of your TV, common sizes are 200×200mm, 400×400mm, etc.). Always mount into studs, not drywall anchors, for screens over 40 inches.
Wear safety glasses when drilling into walls (especially if there’s tile or stone), and use a level to ensure the mount is straight before tightening all bolts. Many DIY TV wall decoration ideas fall flat, literally, when the screen is crooked.